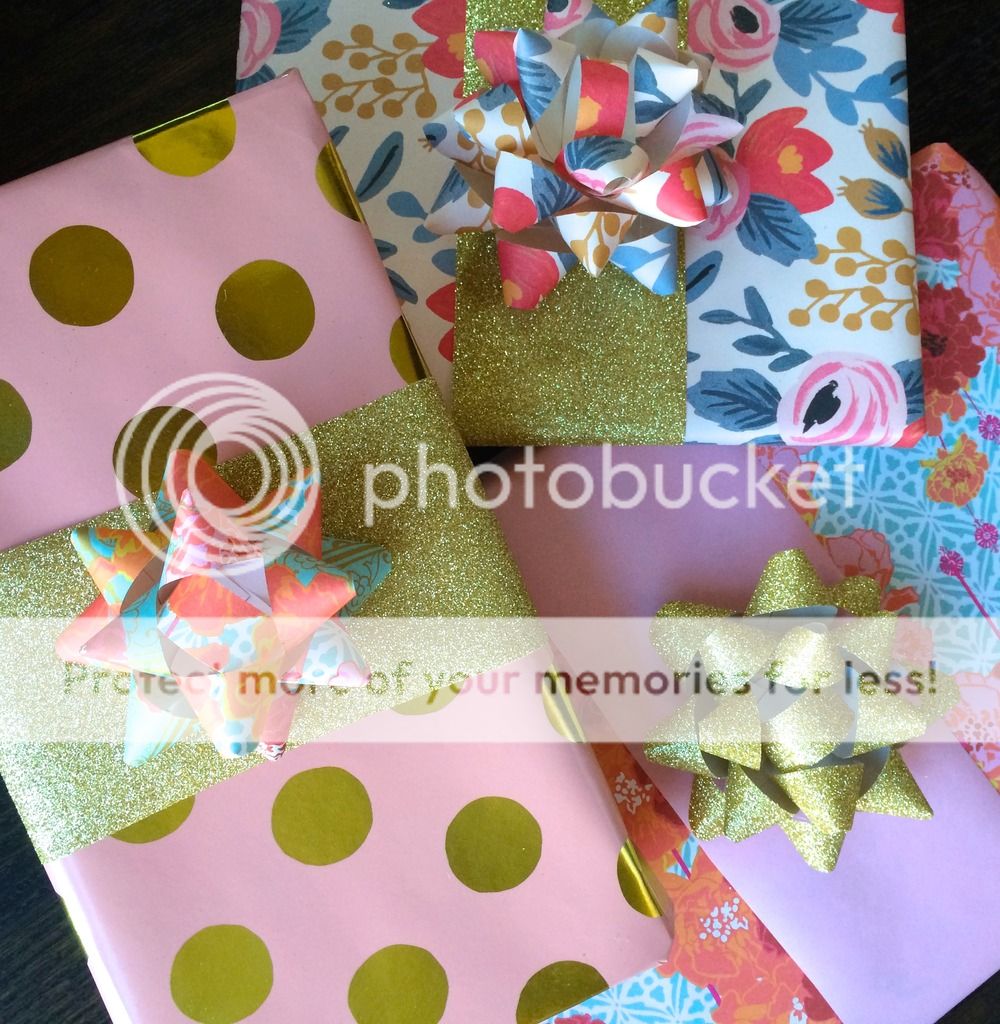
Most of you probably know that I get a real kick out of wrapping pressies! From choosing the paper and cards (usually some fabulous, colourful pattern clashing with some sparkle thrown in for good measure) to the actual wrapping process... I just love dressing up a gift :) And many of you might be familiar with the classic bows I have been making since my girls' party back in 2013 (link and tutorial here)... well, today I am sharing another simple tutorial for how to make the above beauties I whipped up for Allegra and Anya's Birthday this year!
These type of bows have been around for years but can often be costly when buying from stores and it can also be difficult finding the colour/pattern you are after to suit your wrapping paper! With Christmas upon us it's the perfect time to get a heads start with your wrapping... so, grab a pair of scissors, some glue and some pretty paper and away you go... :)
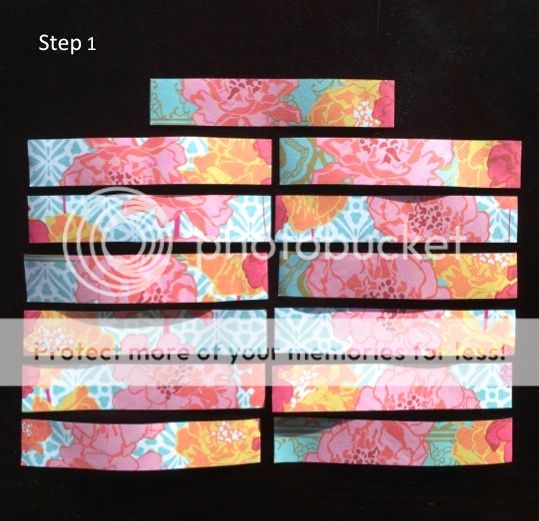
Step 1: To create a medium sized bow (as pictured above), you will need x13 strips of patterned (or plain) paper. My strips usually measure 4" x 0.75 (or approximately 10cms x 2cms). To adjust the size of your bow, simply adjust the size of your paper strips.
 Step 2: Fold and glue the ends together on 12 of the strips (you can use any craft glue but I find my trusty hot glue gun is the most effective and efficient). You can fold to leave the tips slightly rounded (like I have above) or more pointed if you prefer. On the last strip, adhere the ends together creating a circle/loop.
 Step 3: Taking two folded strips at a time, glue them together as pictured above until you have have 6 pairs.
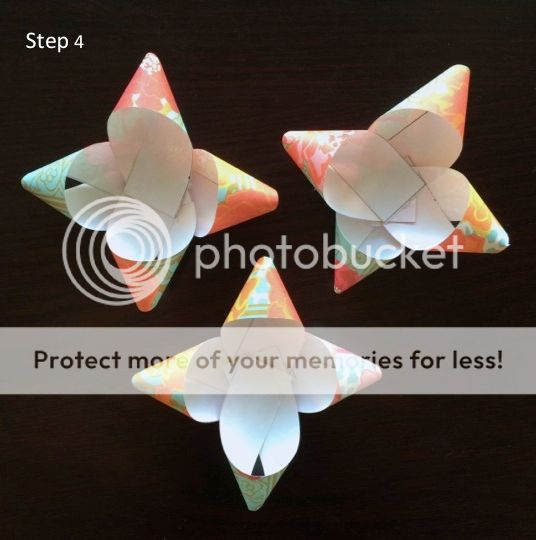 Step 4: Taking two pairs at a time, layer and adhere again until you have three pieces each resembling a cross.
 Step 5: Finally, layer and adhere the three pieces together, turning each piece slightly so that the points fit in-between the layer below. Finish off by adhering your loop in the centre on the top layer.
Voila! There you have it, simple, pretty, paper bows! Once you've got the hang of it you won't even really have to measure precisely and you can also play around with how many loops you add per layer! Happy 'Bouw' making my friends :)